Showing posts with label glitter ritz. Show all posts

Wednesday, November 25, 2015

A Fond Farewell

Several weeks ago Lynette McAsh broke the news that Sweet Pea Stamps would be closing, and as any of you who have followed me know that they are my favorite. They will be sorely missed, but I think that the amazing images will live on for a long time on the blogs and in the hearts of many. So the facebook fan group has organized a big "Farewell Blog Hop". If you following along, then you are on your 3rd stop, so I hope I don't disappoint!

I couldn't decide which of the 60 or so Sweet Pea images I own to share with you for this event, but I narrowed it down to a seasonal image and one that I just love to colour... The first is Katerina Koutiotis' "Hope for the Holidays",  I am pretty sure the 2nd one is Rachel Anderson though I don't know the name. Both of my images are coloured with Copics.

This first image utilizes a bunch of the Close to My Heart White Pines scraps that I had out on my workspace (yeah still working on Operation Use Some Scraps)


The 2nd card I have uses some old Prima Firefly paper, some Viva Pearl Pens, a few tulips I  found and a Heartfelt Creations build a flower that I dusted with "Wink of Stella" (which may be the greatest scrapbook creation this year). Obviously I wanted to throw  some glitter ritz on the gorgeous fairy to show things out in style.


I will miss Sweet Pea, and I have been loading up on digis the past few days, so I encourage you to do the same thing! Thanks for stopping by and enjoy your trip around the blog world, you are off to see Suzi next  http://suzannebakermckenzie.blogspot.com!!

Here is the complete Blog list!!

1, http://sweetpearubberstamps.blogspot.com  (You already did this)
2. Holley's Blog http://holleybarnhartsblog.blogspot.com (This too)
3. Colleen Dewis http://stressedisjustdessertsbackwards.blogspot.ca/ (you are here now silly)
5. Cindy van Oorschot http://cmvanoorschot.blogspot.ca
10. Olivia Rivera-Marmara http://www.ormcraftynights.blogspot.com
11. Winnie A Ludvigsen http://norwayscrapper.blogspot.no/
12. Tera Thelma Borer- Fujan http://www.stampqueen.blogspot.com
16. Samantha Aguilera http://designsbysammy.blogspot.com/
17. Angelique Engeldesignsscrap http://engeldesignsscrap.blogspot.nl/
20. Hilde Larsen http://tindaloo.blogspot.com
25.   Ria ZonneStraaltje http://dragonmagicscrapkaarten.blogspot.nl/
29. Christina Gudgeon http://craftieangel.blogspot.com.au/

Friday, September 21, 2012

Mmmwahahahhahahaha... but Cuter

Well fine, I am a big nerd. In case you didn't know... Anyways I got these great new stamps from There She Goes Stamps,http://www.tsgstamps.com/Cutie_Pi_p/cutie-pi.htm the set is called Cutie Pi (I KNOW!!). I bought them because they have a Pi symbol on it but love the rest of them. So I thought I would concoct a little solution with some of the other cool things I have in my stash right now. Just a plain grey cardstock background, but to spice it up a little I did some first and second generation stamping with CTMH's Lagoon ink. The solid turquoise glitter paper (yep,  it exists thanks to American Crafts, it is called AC duotone Glitter paper... in this case Aqua) was surprisingly easy to cut with scissors. I traced around the outside of my spellbinder's die to get a small border. The stripey paper is from my Mind's Eye "My favorite things" paper pad (also contains mustache paper by the way...). This cutie is stamped on CTMH paper with Memento Tuxedo Black ink and heat set because well I have no patience or ability to plan my creative spurts. I also stamped out the beaker set  and the "According to my calculations UR the BOMB" Sentiment. I wanted to carry the glitter forward and add a little something to what she was stamped on, so I used my CTMH ultrafine glue and some Glitter Ritz to make a border. Just put on the glue and leave to dry for 5 minutes, then you can just rub the glitter on with your finger. Almost no mess for the win.


Now for the down and dirty deets for the colours. It is a combination of copics and Sakura Jelly Roll Pens.
Skin E11, E02, E00
Beakers/ Goggles C1, C2, C3
Hair E13, E15, E18
Clothes/Shoes B02, B04, B06
Beaker (in Hand) YR04,YR07, YR09

Other Beaker Fluids, hair bobbles and some details on shoes are with Jelly Rolls (you know for the added depth of glitter without the work)

I then fussy cut the beakers, threw some pop dots on things and then whacked the whole thing together. I tried to group a few beakers together to create some flow from the sentiment across the image. Then for some added depth I added some Liquid Glass (CTMH order #Z679) on all of the beakers and the lenses of her goggles.

Hope you like it.


Thursday, November 10, 2011

Super Easy Christmas Card

Hi All,


So everyone has a huge list of people that they would like to send Christmas Cards to, but if you are like me you have a few people that don't appreciate the awesomeness of your cards as much as you would like to. I always try to make some quick cards that still look great for those people. This is one that I made the other day that doesn't take too long to come together.


First I stamped the snowman image on cardstock, I used Staz-on but not required when using chalks to colour. Step 2 was to fire on some colour, and it went on as quick as make-up with a few little strokes. To keep the chalk in place there is a splash of Glimmer Mist over the top. I then used a circle punch to punch the image out. The card base it made using the Dahlia Spellbinders Nestabilities, with one edge up off the edge of the paper where the fold is. I then stamped one of the new Heartfelt Creations stamps (They are made to match up with spellbinder dies, how fabulous!!). I then covered the front with Sookwang tape, and obviously there was then a need to cover it with Glitter Ritz. Remember that the Glitter Ritz is fussy about adhesives, so I used liquid glass to stick on the snowman.


What do you think?

Saturday, October 22, 2011

Sweet Pea Next Card Designer Challenge

Well if you have been following, you are aware of my recent addiction. I have finally gotten my new ones mounted and I got one all chalked up for this contest. I was really inspired by the soft lines and the floating bits, I could just imagine them glittering down around them. So glitter it is!!

I created the card base using CTMH paper, and covered it with some sookwang tape and transparent Glitter Ritz.


I used soft chalks on the image and set it with a little bit of Glimmer Mist. I mounted this on this super fantastic velvet paper that my LSS just got in. The large butterfly is also cut out of this. You have to get some, it feels great and cuts like butter. I cut 2, and mounted one on CTMH's new Roxie paper, and the other one is flat on the background. The top one is only attached in the center, and it gives a great 3D effect. The small butterflies are CTMH, as are the jems and pearls used.


The rosettes were cut using a sizzix die and rolled and shaped by hand. The leaves are done using a cuttlebug die.


Everything is attached using Glossy Accents as the Glitter Ritz can be termpermental with adhesives.


Sorry about the icky picture, there was some stickles that wasn't dry so the scanner wasn't an option. I will rescan when it finishes drying. Long day curling, didn't get to finish it until now. I love all the other cards I have seen though, Sweet Peas you are going to have a tough choice. Come back soon, I have an amazing technique I just learned from a friend with alcohol inks and a lighter that will be up soon.


Monday, August 15, 2011

Superfun with Glitter

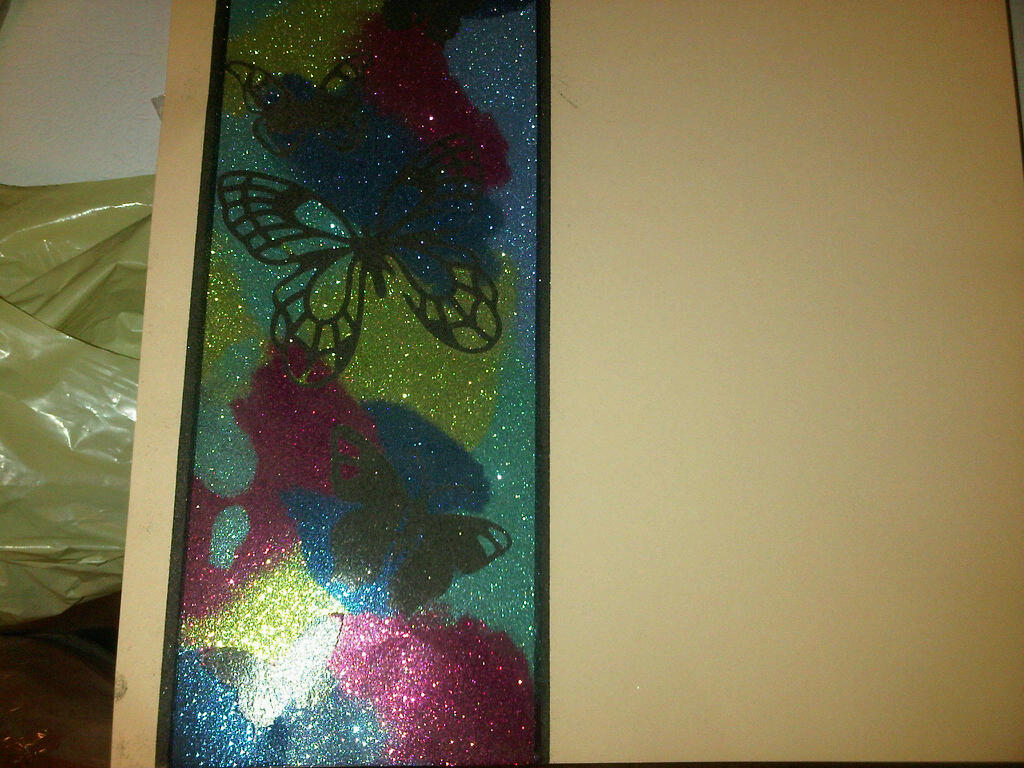
Good evening ladies and gents. Tonight for your viewing pleasure I have what may be my favorite page I have done ever. I will state straight up that this is a scraplift from the ladies at Carosel Rubber stamps.


Ok so for the items used


  • 115 mm and 2mm sookwang doublesided tape


  • several colours glitter ritz


  • mask shapes (plastic is the easiest to get off, but paper works too)


  • 1 piece of cardstock


  • mini muffin papers (I will explain later)


  • large craft mat or scrap piece of paper (has to be bigger than the paper you are working on)


  • paint brush or papertowel


  • An apron or garbage bag to cover yourself in....


Ok so here we go. First make sure that you have some clean space to work in because the tape is SUPER sticky. If you have one of those anti-static bags for embossing, rub down your cardstock and your craft mat, it will make things easier in the long run. Glitter ritz has a static charge to it, so it likes to stick.


  1. Put your tape as you would like it on your page. I won't judge you at all if you would like to cover your entire page, I know how awesome this looks! Remove backing and place masks how you would like them. Ensure that they are stuck down well, or glitter will sneak underneath and your design won't look as crisp


  2. Pour your first colour of Glitter ritz into the muffin papers. I find this is the easiest way to contain them, but you could also use a spoon or a straw. Gently cover the areas you would like in this colour. Gently use your finger to burnish (rub) the glitter into the area. This just ensures that you get a really rich covering and that other colours won't stick in the spaces


  3. This is the hardest part right now. You can't just tip to the side like you would with embossing powder or you will end up with a line of glitter. You must flip the page over completely in one swift motion, and then tap your layout. This will put all the excess onto your craft mat, then you can put as much as you can back in the jar. Make sure that your mat is completely clean before moving on to the next colour, so use the paintbrust or the paper towel to wipe it off. If you are using one, give it a static sweep too.


  4. Repeat with all of the colours until the tape is filled.


  5. To finish off your creation, use the 2mm tape to create a nice clean border. Lift up your masks, then use black (or your colour of choice) to fill in the borders.


  6. To ensure that the glitter doesn't invade your house, do another round of burnishing. The muffin cups and your fingers work well for this but you can also use a brayer.


  7. Add in your pictures, and if you get excited a few accents. I used a Close to my Heart crocheted flower, a pewter brad and a Prima flower that matched my glitter colours. To add some dimention I also added some butterflies the same as what I had used for masks, but only attached them in the center. Remember you need heavy duty adhesive like liquid glass when attaching to glitter


Have fun!! Love to see what you would do with this technique.


In other news, I promise better pictures from now on. I think that the scanner is going to work out.